Usage of ONDEL StreamValidator
Overview
This document provides a user guide for both the WebAssembly-based StreamValidator and the binary StreamValidator. Screenshots are included to illustrate the validation workflow and the results generated by StreamValidator.
Using the WebAssembly-based StreamValidator
The user interface (UI) of the WebAssembly-based StreamValidator is shown in the screenshot below.

At the start of validation, the UI includes the following components:
- Input field: Enter an online content URL or upload a local file.
- Validation options:
- Baseline checks: Core Dolby-specific requirements for Dolby Digital Plus, Dolby AC-4, Dolby AC-4 segment alignment, and Dolby Vision
- Optional checks: Additional requirements, such as Dolby AC-4 ATSC 3.0 compliance
- Additional functions:
- Decryption: Add key-value pairs for decrypting encrypted input
- Demux: Extract elementary streams during validation
- Record: Save media files referenced by the input during validation
- Duration: Specify how much of the stream to parse (recommended for live streams)
- Validation controls:
- SELECT STREAMS: Start validation in a mode that lets you choose which media streams to validate
- START: Start validation for all media in the input, or for selected content
Validation workflow: To start validation, provide input, configure validation options, and click the Start button.

- Provide input: Provide input by entering a URL or uploading local files. Supported input formats include DASH manifests, HLS playlists, MP4 files, and Dolby Digital Plus or Dolby AC-4 elementary streams.
- URL: Enter the URL in the input field.
- Local files: Click UPLOAD, then select your file.
- For MP4 or elementary stream files: Select and upload the file directly.
- For DASH or HLS content: Package the manifest/playlist and all referenced media files into a .zip file, then upload the .zip file. (Details refer to Note 1)
Note 1: Ensure that the manifest/playlist and media files use correct relative paths in the .zip file. Otherwise, StreamValidator cannot locate media segments during validation.
After uploading a .zip file, StreamValidator takes some time to extract it. Once extraction is complete, available URLs appear below the input field. Select the desired input.
2. Configure validation options and additional functions: After providing input, configure the validation process.
StreamValidator validates whether content complies with Dolby specifications. Select checkboxes to customize validation based on your content and target environment.
Baseline checks: If no options are selected, all baseline checks run by default, along with additional checks (checkpoints 310000, 330000, 410000, 430000).
Optional checks: These checks run only when selected.
Select additional functions if needed.

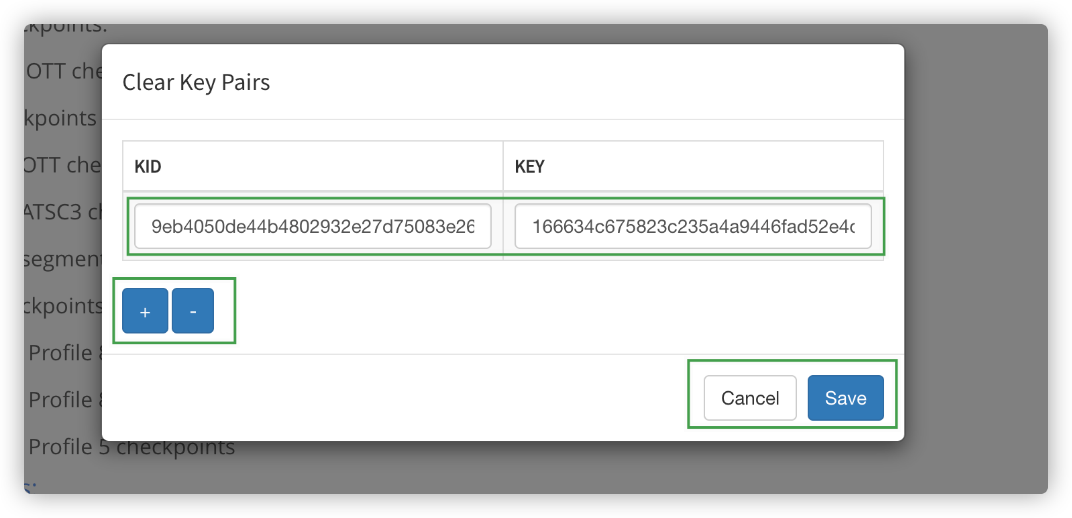
Decryption: Select this option to add key-value pairs for encrypted content. Select the Decryption checkbox to open the configuration dialog, add or remove key-value pairs using the + and - icons, and click Save to apply changes or Cancel to exit.
Demux: Select this option to extract media into elementary streams during validation. A download link for the demuxed output is provided after validation.
Record: Select this option to save media segments during validation. A download link is provided after validation.
Duration: Select this option to limit how much of the stream is parsed. StreamValidator stops parsing segments when the parsed duration matches the setting value. This option is recommended for validating live streams.

3. Start validation: Click START to validate all streams. Click SELECT STREAMS to choose specific streams, then click START.

Tip for SELECT STREAMS: Use Select all to quickly select all streams. Click BACK to return if needed.

Results:
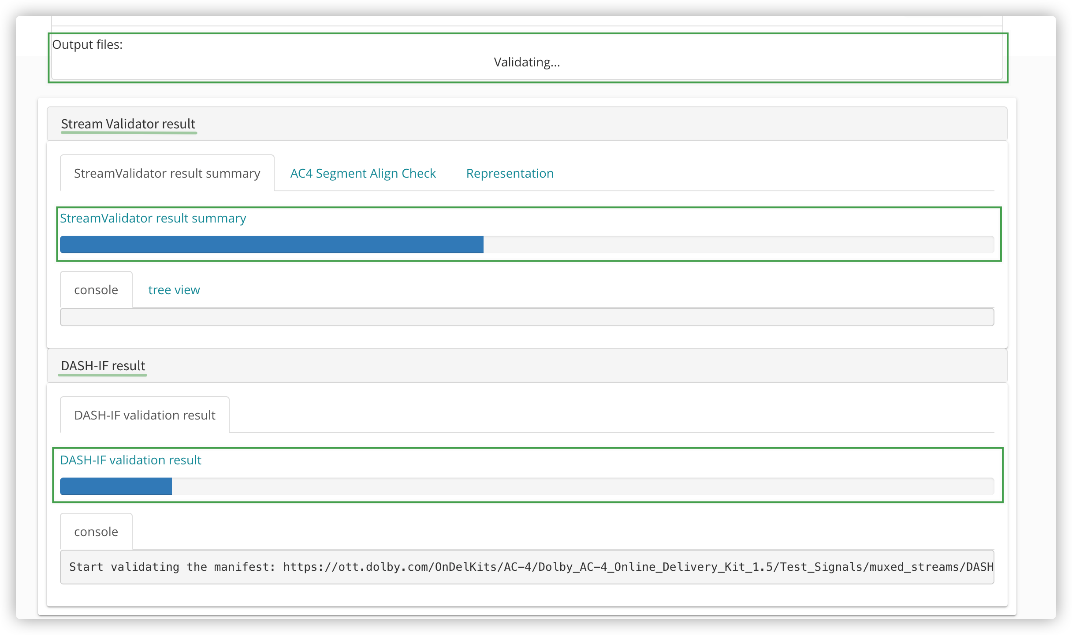
Output files:
- Output files: Output files appear if Demux or Record is enabled. If Demux is selected, StreamValidator packages all demuxed elementary streams into demux_output.zip and provides a download link in the Output files field. If Record is selected, StreamValidator packages all recorded media files into segments.zip, and the download link also appears in the Output files field.
![]()
Validation results: StreamValidator validates cross-level conformance by checking consistency between information at different levels of the same stream.
For example, if the input is a DASH manifest, StreamValidator checks Representation-level, MP4-level, and elementary stream-level information for each representation.
StreamValidator also performs content-specific checks: for Dolby AC-4 content, StreamValidator verifies A/V segment alignment; for AC-4 or Dolby Digital Plus content, StreamValidator checks whether elementary streams conform to Dolby requirements.
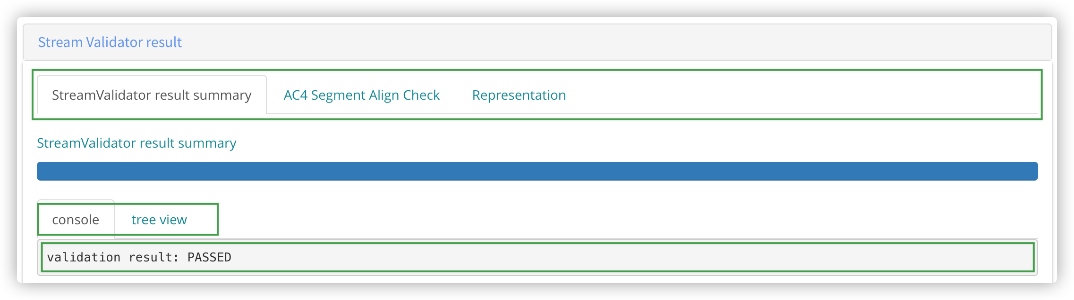
After validation, the first tab in the Results area shows the summary.
Additional tabs show detailed reports. You can click tabs to switch views.
Each report includes validation logs and media information (codec, resolution, bitrate, Dolby Vision profile).
For multi-representation streams, use the dropdown to view each stream.
The validation progress is shown with color-coded progress bars:
green indicates passed validation and red indicates failed validation.