GUI overview
All application functions can be managed through the GUI workspace.
Figure: Test application GUI
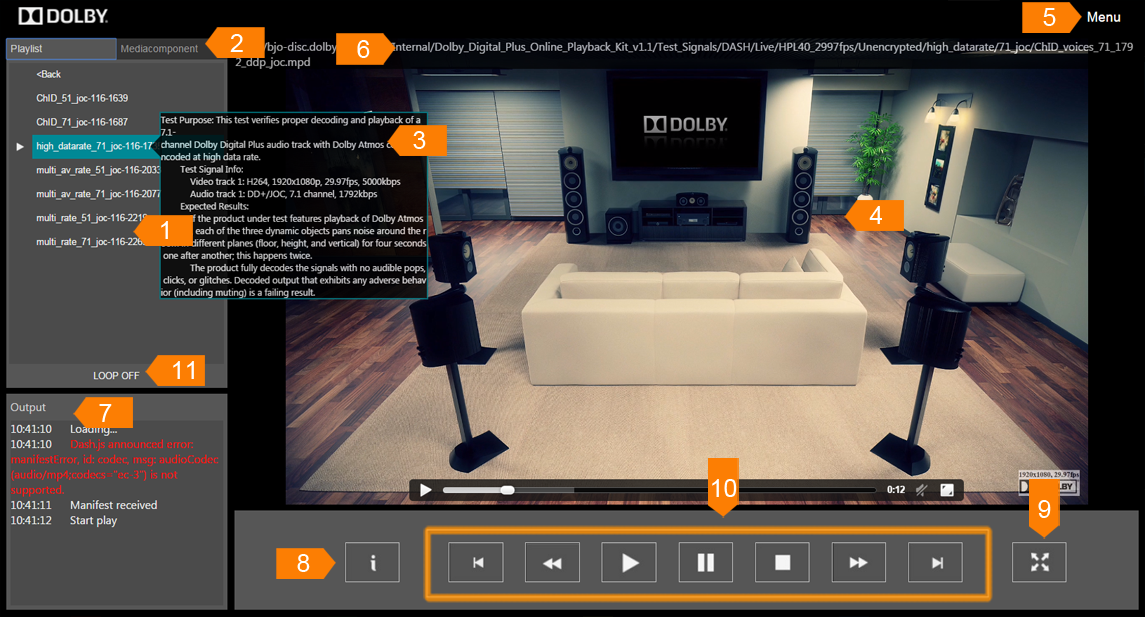
- 1 Playlist
- Displays a list of test signals. Test signals are organized in a hierarchy.
- 2 Media component
- Displays audio and video tracks with different encodings presented in a test stream. This tab works for MPEG-DASH test streams only.
- 3 Information box
- Displays information about a selected test signal, such as bit rate, available audio and video tracks, purpose of the test signal, and so on.
- 4 Playback window
- Displays video content of a currently playing test signal.
- 5 Menu
- Contains options: Load a signal, About, and Back.
- 6 URL information
- Displays the URL information of the currently playing test signal.
- 7 Output
- Displays information such as playback status, bit-rate information, error messages, and so on.
- 8 Information button
- Click this key to display information about a selected test signal, such as bit rate, available audio and video tracks, purpose of the test signal, and so on.
- 9 Full screen
- Click this key to play back video content in full-screen mode.
- 10 Playback control
- Use these keys to control the playback process. (From left to right, keys include previous, rewind, play, pause, stop, fast forward, and next.)
- 11 Loop on/off
- With the loop function on, the test application plays back each test signal continuously one after another until it finishes playing the final available test signal.